User registration is for users who are first time login to BDA-Athena.
The steps for user registration are as follow:
-
Enter this link https://athena.bda.gov.my/ to web browser.
-
Key in SarawakNet LDAP username and password. Click "Login" button as shown in Figure 1.1 for authentication.
Figure 1.1: SarawakNet LDAP for authentication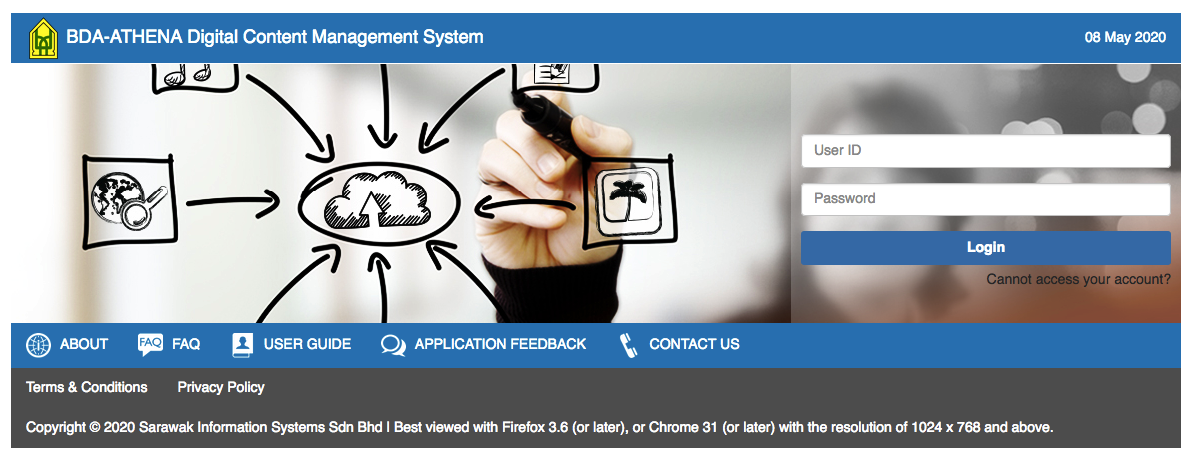
-
System will prompt a First Time Login dialog and ask to create profile. Click "Create" button as shown in Figure 1.2.
Figure 1.2: Create profile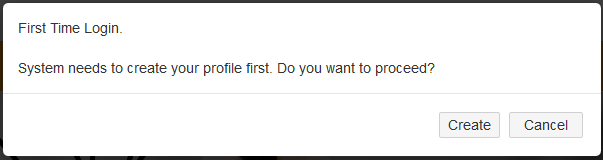
-
User details will be shown as in Figure 1.3. Select the Agenecy / Department if your Agency / Department is in the selection list. Enter your Agenecy / Department if your Agency / Department is not in the selection list.
Figure 1.3: User details when registration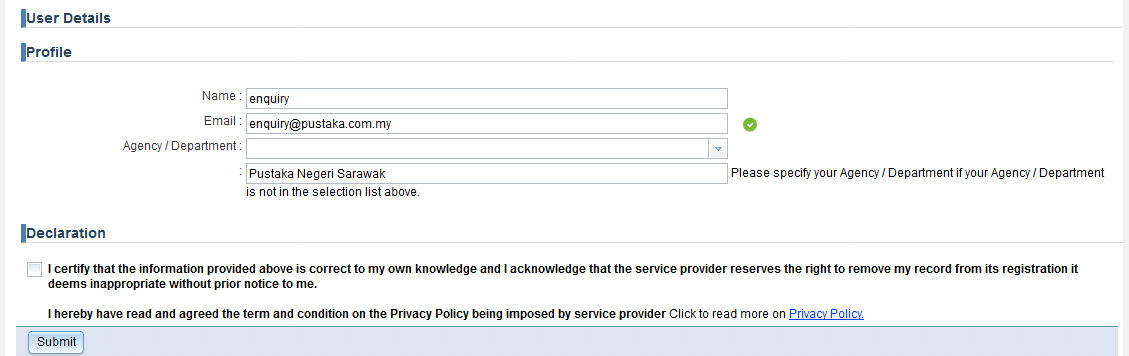
-
Check the Declaration to allow to submit for the registration as shown in Figure 1.4.
Figure 1.4: Declaration when registration
-
If forget to check the declaration check box, system will prompt a dialog as shown in Figure 1.5. Click "OK" button then check the declaration as shown in Step 5.
Figure 1.5: Dialog when submit the user registration form without check the declaration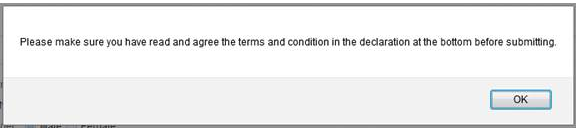
-
Click "Submit" button to finish profile creation for first time login. System will prompt a dialog about Account Saved as shown in Figure 1.6. Click "OK" button then system will redirect to Login page.
Figure 1.6: Account saved
-
Enter username and password again to login to BDA-Athena.
Upon succeed login, a screen as shown in Figure 1.7 will be shown.
Figure 1.7: Screen after login
Search here refer to signed in users search for files in BDA-Athena. There are three types of search provided by Athena which are basic Search, Advanced Search and Browse.
-
Enter the keyword into the Search field and click "SEARCH" button as shown in Figure 3.1.
Figure 3.1: Basic search
-
System will display the searching results as shown in Figure 3.2.
Figure 3.2: Searching results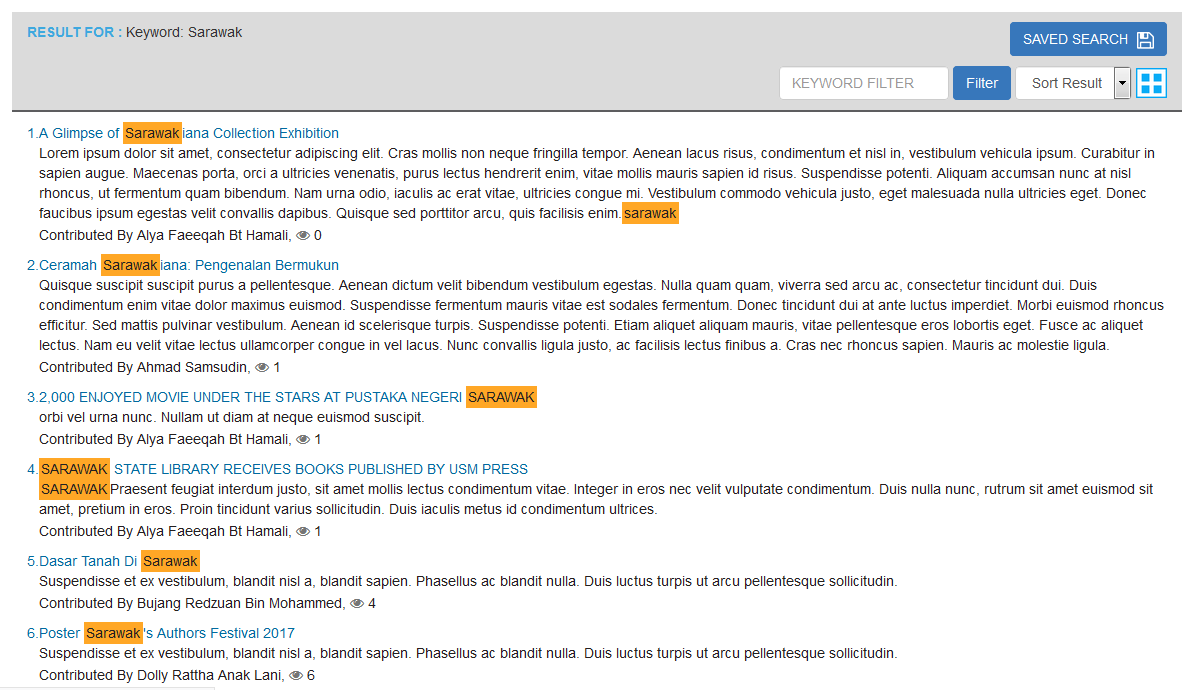
-
Enter the keyword into Filter field as shown in Figure 3.3 to further filter the searching results.
Figure 3.3: Filter the searching results
-
Click the "SAVE SEARCH" button to save the searching. System will will prompt a save search dialog as shown in Figure 3.4. Enter the name for the save search and click "Submit" button.
Figure 3.4: Save Search dialog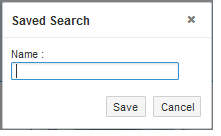
-
Click "Saved Search" to access the saved search as shown in Figure 3.5.
Figure 3.5: Access Saved Search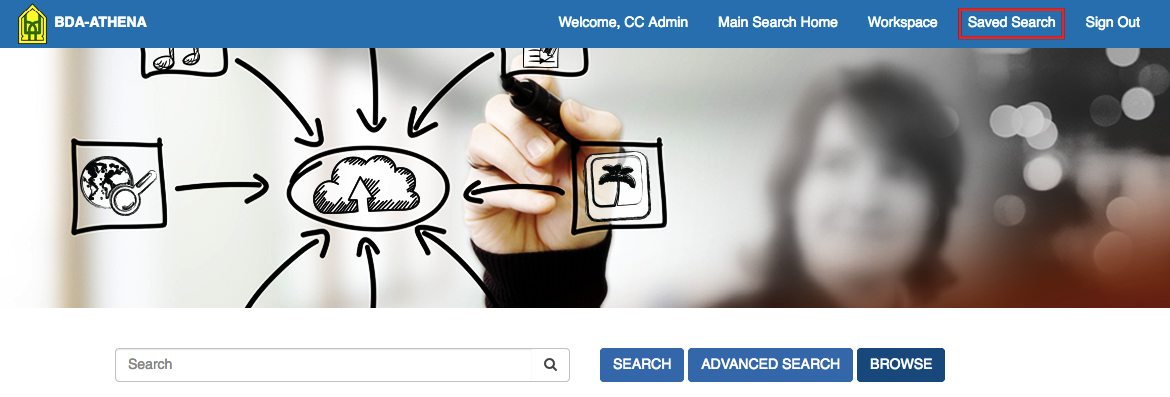
-
System will display the list of saved search as shown in Figure 3.6. Click the Name to access the saved search. Click
 if want to delete the saved search. Figure 3.6: List of saved search
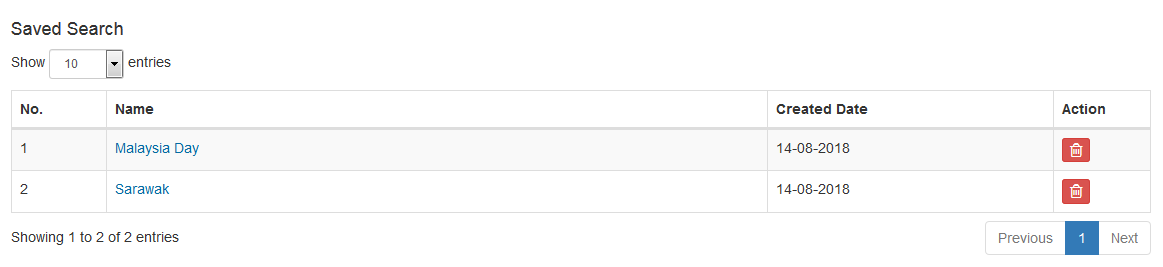
-
Click the "ADVANCED SEARCH" to perform advanced search. System will display the fields as shown in Figure 3.7.
Figure 3.7: Advanced search
-
Enter the related field and click "SEARCH" button which is beside the "ADVANCED SEARCH" button.
-
The result of the advanced search will be shown.
-
Click "BROWSE" button to access browse as shown in Figure 3.8.
Figure 3.8: Browse
-
System will display a list of Browse category as shown in Figure 3.9.
Figure 3.9: Browse category
-
Click on the category that want to browse. The system will then display the list of browe as shown in Figure 3.10.
Figure 3.10: List of browse
-
select the desired item from the browse list and the system will display the related document.